9.28.2013

{Home Decor} Fall 2013

Somehow I managed to get my fall decorations down from the attic and put up a few things this year. I have always been a huge fan of summer, but this year I'm surprisingly ready for leaves to crunch beneath my feet and cool outdoors to make me pull my cardigan on a little tighter. I'm ready to wear my comfy boots and dress all the kids in adorable pants and long-sleeve tunic tops with leggings. I'm down for some chili, the sounds of football on Sunday (and Monday and Thursday) and open windows beckoning in fresh air. It's like a cleansing and renewal to kick-off the last half of the year, sort of whatever might be the opposite of spring cleaning. Fall freshening? Either way, this year I'm ready. And though it felt a little odd to be unpacking pumpkin muffin-scented plug-ins and lighting apple ale candles—both new faves from Bath & Body Works—while it was 100 degrees outside, it soon felt oh-so-right.


I also must confess it's taken nearly eight weeks just to get around to cleaning the bathrooms in my house. Which basically means I hadn't cleaned them once since we moved in. Thus I'll be hiring a once-monthly cleaning service to come sanitize my commodes and scrub my dirty floors very soon. Until then, the floors will proudly sport their scuffs and well-earned dirt. While I'm confessing, I didn't bother to clean much house before I took these photos. (Really, I just moved a bunch of stuff around since I didn't think car seats and strollers and boxes went well with fall foliage and pumpkins. Just sayin'.) So here's a little bit of fall with some lived-in-casa on the side. ;)

front porch

entry way

kitchen

play room

dining room

living room

guest bath

There you have it! I didn't put much in the main living room since I got tired by that point and I did have three cute metallic ceramic pumpkins on the coffee table...but little man who shall not be named decided to snatch one when I wasn't looking and once I came after him to get it back, well, he decided it looked better in smithereens on the floor. Harrison 1, Pumpkins 0.

Happy fall, y'all :)

Next up: pumpkin spice bread and one nifty little loaf pan.
post signature

9.27.2013

{Daily Pics} Easy Greek Salad, New Accessories & More

daddy leading the kiddies up the stairs (in a supervised climb!) to their rooms for bed

new accessories from sam moon - the hat is perfect for cowboys football!

trystan trying out a new toy mommy got for the crew

the babies also love their new fisher-price piano

super easy greek salad - pasta with sliced olives and marinated garlic cloves,
feta cheese, greek dressing and rotisserie chicken

Happy Friday!
post signature

9.23.2013

{DIY} How to Clean Glass Candle Jars

Typically, I'm not one to save every little thing and try to reuse it. Honestly, sometimes it takes up more space and energy trying to figure out ways to recycle some stuff then to just toss it in the trash. Or recycling bin. ;)

But I always wished I could clean those nice big glass jars that the Bath & Body Works candles come in and reuse them. Then I found a couple cleaning ideas on Pinterest and put one to the test. It worked like a charm so I share it with you now.


Put the candle in the freezer for about an hour. Or just toss it in there and forget about it for a couple days until you can get back to it, like I did. Take a dull knife and poke at the wax a couple times to break it up then pry it out.


I saved my wax pieces in a ziploc and just wrote the scent on the bag then stuck it back in the freezer. Now I'll have my own wax melts when next summer rolls around, likewise for my fall and winter scented candles when I'm done with those, too. Perfect for any size wax warmer and a good lil money saver!


Peel off the labels. If the bottom label doesn't comply, stick the jar in a little bit of warm soapy water for a few minutes and it'll then peel right off.


Squirt some baby oil in the jar and use a paper towel to wipe off most of the soot and wax. I did this twice, I think, it be sure it was all clean.


Do a quick rinse with soap and water then dry. It's ready to use now! I used mine for Q-tips and cotton balls in our bathroom, but I also thought they'd make great gift jars filled with candy and wrapped with a bow or stacked full of small cookies. What would you do with these jars?


For fun, here's some of my favorite gift-in-a-jar ideas.
post signature

9.18.2013

{My Recipes} White Bean Chicken Chili + Easy Bonus Recipe

It's been a busy week around here. My BFF is here with her kiddo for the week and we've been having little adventures every day, the sort that come with having five babies all 15 months in one house. And I say that with love and a twinkle in my eye. ;)

Crock pot meals can definitely be the way to go when you've got a minimum amount of time on your hands. So I'm all about dumping a bunch of ingredients in to make a yummy meal. I sort of kept adding things to this one until I felt it was right. And, boy, was it.


2 tbsp olive oil
2 cups chicken stock
1 tbsp corn starch
1 medium onion chopped OR 2 tbsp dried minced onion
2 cobs fresh corn (slice corn off cob)
2 cans white beans (drained)
2 tsp cumin
2 tsp chili powder
2-3 chicken breasts
2-3 tsp salt
1 tsp pepper

Add all ingredients to your crock pot and cook on warm for four hours. I used cannellini beans for the chili and served mine with Bisquick drop biscuits (they took about 10 minutes to make and bake), but this would be great with regular biscuits, cornbread or toast. I ended up needing to add a little more salt to mine and I loved the fresh corn in the recipe. You could also add fresh tomatoes, peppers, Rotel or more! I strained out chicken, beans and corn for my babies to eat with the biscuits and they gobbled it up.


Bonus recipe: place 3 chicken breasts in crock pot and coat with an entire 16-ounce jar of BBQ sauce. I'd highly suggest Jack Daniels brand sauce. Cook on low for around four hours then shred chicken and serve with guacamole and cheese on corn tortillas. Easy peasy!

Happy eating :)

post signature


9.14.2013

{Daily Pics} Fall, Y'all?

I finally decided it was fall. It's still 98 degrees outside here in Dallas, but a few leaves are starting to flutter to the ground and the weather man promises 92 as a high later this week. So maybe the season is tilting slightly toward the autumn time, as much of a tilt as can be provided by hot Texas temps. Which I love, by the way. I'm a warm weather gal through and through. I'd love to spend all my days slathered in tanning oil by a pool smelling coconut and drinking something cold. Something about having quadruplets, though, means that's no longer your daily reality. Ha! Here's some sneak peeks of some fall decor I managed to stick up around the house yesterday (with a post in more detail hopefully next week). Plus a photo of our whole fam at my cousin's wedding earlier this afternoon.

fun fall sunflowers & carnations

my pumpkin-y front porch

love my wax burner! got this one for $15 at target and am using glade's pumpkin spice wax melts

my entry table with white, gold and blue fall accents

our family!
Up next: in the spirit of fall, a yummy (easy) chicken chili recipe!
post signature

9.11.2013

{My Recipes} Lemon Garlic Pasta with Chicken

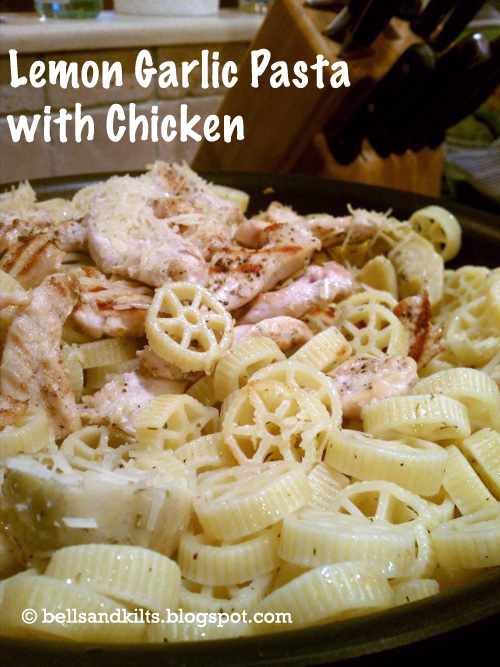
I really wanted a light, fresh pasta dinner the other night and came up with this delicious concoction of chicken, pasta, artichoke hearts, lemon juice and garlic. Yum! The quads loved it too and using the large wagon wheel pasta made it easy for them to pick it up with their little fingers.


2 large chicken breasts, cut in small pieces
1 package pasta, any kind will work
2 tbsp minced garlic
2 large lemons or 3 small ones
1/4 cup grated parmesan
1 cup marinated artichoke hearts, quartered
3 tbsp olive oil, plus extra for grilling
Freshly ground sea salt and pepper
Fresh or dried Italian seasonings

First I heated up my stovetop grill pan and wiped it down with some olive oil. I placed all my chicken on top and gave them a hearty sprinkling of salt and pepper. Once they were nearly ready to flip, I squeezed one whole lemon worth of juice on top, then turned the pieces and grilled the other side. While that was cooking, I brought a large pot of water to a boil then added my pasta and cooked to al dente.

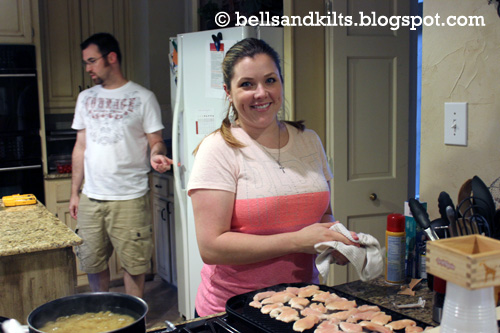
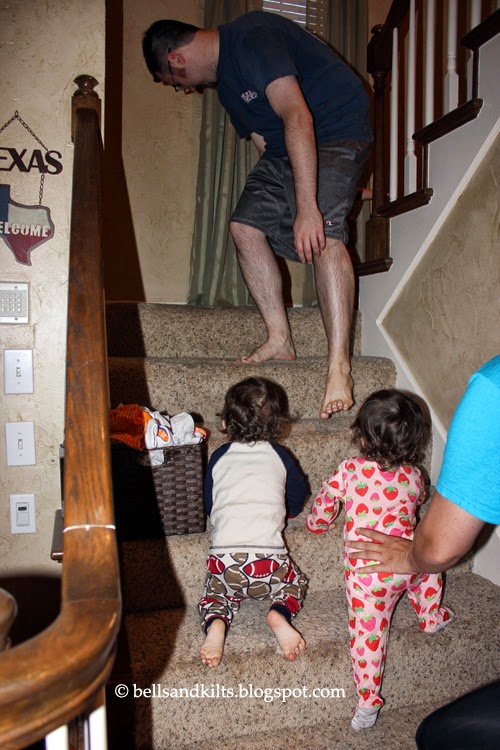
Yup, that's me at the end of a busy day running after four kids
and now I'm over a hot grill cooking dinner. Sexy, I know. ;)
After I drained the pasta, I heated the 3 tbsp of olive oil, garlic, artichokes and a generous sprinkling of my dried Italian seasonings over medium heat. Once it was smelling really fragrant and delicious, I added the pasta and squeezed in the juice of the remaining lemons (you can add more or less lemon juice as desired). Next I mixed in the grilled chicken and topped it all with the Parmesan cheese and served with salad, steamed broccoli and garlic bread. A definite crowd pleaser!


Happy eating :)
post signature

9.09.2013

{DIY Project} Monogram Wall Art

I've been trying to decide what creative flairs I could add to the kid's room, since I'm just now working on decorating them. I'd had a couple things stashed before we ever moved in, but they amount to a few wall hangings and accents, a mirror and their first finger paintings preserved in frames I got at Hobby Lobby. Then I saw these really cute square monogram art pieces a friend of mine made for her little girl's room and I knew that's what I wanted to add to Trystan and Logan's room!


I started with a stack of chipboard squares, that I got for 50% off at Hobby Lobby. Then I printed out all the letters I needed to spell out two of the girl's names here


With some cheap-o white craft paint, I painted all the edges white so they wouldn't clash with the art I was putting on the front of the squares.


Then I carefully cut out all my letter squares...


...and mod podged them onto my chipboard.


Ta-dah! They turned out super cute. I haven't hung them up yet, so I'll follow up on that when I put together a post on Trystan and Logan's room once I have a few more things finished. I plan to use 3M picture hangers (not hooks) that provide a sort of velcro patch for light-weight wall objects. That way if I want to move things around later, I don't have eight million nail holes in the walls!


I snuck in some of the roses I clipped from my front yard in the photo above. They smell nearly as sweet as sugar. Plus I was in a good mood since I fiiiinnnaaallly got to complete a crafty craft. The kids really didn't understand the importance of mod podging chipboards for their room so they protested (loudly) every time I was out of their line of sight to work on them in the kitchen. Even though I explained to them how nice it'll be to have things on their walls to look at. Babies...what can you do!? ;)
post signature

9.05.2013

{Quad Squad} Simple Sensory Ziploc Bag!

This little DIY post is just a quick share on a recent "discovery" experience I created for the quads using a couple things around my house. Most of the time, for sensory activities we do things like water play, explore in the grass, grapple with new toys, try a new food or go on an outing. But I needed an indoor, stationary project and this one fit the bill. I checked out a couple "sensory bag" ideas on Pinterest then decided I could throw together my own.


I took four large thick Ziplocs and put a couple squirts of finger paint in them then about an inch or two of water in the bottom, added a couple shakes of glitter and carefully closed the bags. Then I took clear packing tape and taped all four sides of each bag onto our quad table—because they will find those loose corners!—and mixed up the ingredients. Then I added the babies. :)


They loved it! I gave them little balls and toy cars to roll over the bags and they soon abandoned those and just used their hands. Kailey immediately managed to poke a small hole in hers but I put another piece of clear tape across it and problem solved. I would definitely use clear packing tape or something similar, as it peeled off the table easily when we were done and didn't appear to damage the finish.


Before we wrapped up, though, I gave the kids their snacks at the table and they loved chasing the crumbs all over the tops of the bags with their fingers. You could really add any type of glitter, stickers, paint or other ingredients to your bag, as long as there's nothing to potentially cause a leak. (Other than your child's razor finger nails.) I'v heard hair gel and food coloring makes a good combo. The best part? Clean up is a cinch.

Next up: DIY personalized name art for kid's rooms.
post signature
Related Posts Plugin for WordPress, Blogger...