Showing posts with label DIY. Show all posts

6.24.2015

Noah's Ark Lesson + Animal Craft

It's been awhile since I've done a book and craft combo with the kids, so when I spotted a box craft set of paper plate animals on super sale at Michael's I went ahead and grabbed it to stow away for a rainy day. A few weeks later, I came up with an animal-related lesson we could do and found a Noah's Ark book
while at the library.


After a massive toy swap out in their play room, I remembered we actually had a Noah's Ark toy in their box of Little People stuff so I pulled that out and used it to explain who Noah was and what the ark looked like. The kids each held two animals of their choosing while I read the book to them, then I slid the boat around the table and let them each march their figurines into the ark "two by two" before we started our craft.


I'm not one to shy away from putting together a set of craft supplies myself—and I keep several craft drawers stocked with random supplies to rummage through for just such an occasion—but it really did help that everything I needed came in the box.  The quads were able to peel the paper backing off the foam sticker pieces themselves and I would show them how to copy the photo on the box to assemble their respective animals. Coincidentally, two made a zebra and two made a monkey.


They were quite proud of their finished pieces and show them off to anyone who comes over since I hung them on their art boards in the play room (along with their super cute Father's Day card my mom helped them make, complete with flowers!).


After the craft, we watched our Baby Einstein's Baby Noah DVD—yes, we still have many of our Baby Einstein DVDs because they still love them—and it held their attention for the entire 38 minutes. That's like five years in toddler time, right!? I actually emptied the dishwasher and reloaded it, completely uninterrupted and without up to eight hands wanting to "help me." Plus, I think between the craft, Little People toy and DVD, the concept of Noah and his ark was very much solidified in their minds because they've repeated the story a few times since.

Mission accomplished.
post signature

6.03.2015

My Sanity Thanks Our Teachers

I remember ushering four kids down the hall, two or three of them holding tightly onto various fingers of my hand as they nervously shuffled their feet along. It was their first day at Mother's Day Out, a sort of pre-cursor to pre-school, if you will. I had to peel a few of them off of me in order to get them through the door of their class room and could still hear their wails as I made my way back to the front doors. But! Within two to three visits to their Monday class, they were loving it. And I was loving it! Alone time to accomplish things, clean house, run errands or simply be by myself is invaluable. -slow clapping for all the moms reading this- 

Thanks to two wonderful teachers, Miss Jean and her daughter Miss MacKenzie, my little quad squad has grown to love their school experience. They've met new friends, learned soooo many new things, they get out of the house and under someone else's care for a day, someone that I trust and respect and admire for teaching my kids so well and we all love this experience! What's better, is that the school is at our home church and the Christian-based teaching is so important and valuable to us.

We've now ended the school year and will resume with summer camp in a few weeks—which can't come soon enough!—but I made sure to grab some cute teacher gifts before their last day in class to let those special ladies know how much we appreciate their efforts!


It's not unusual for me to do all my shopping at Target. I can find any excuse to go to Target and we pretty much only frequent a specific Target store where the clerks, clinic nurse and store manager recognize us in the aisles—especially since Trystan's scary seizure when I was mid-checkout one afternoon. I just feel better shopping in a place that I know has everything I need in the case of an emergency! Besides, where else does it feel perfectly normal to buy bananas, spring wedge shoes and a cute striped toddler shirt all in one shopping trip? Don't forget the mascara and shampoo restock.

But I digress. I wanted to put together a cute summery teacher gift and managed to find everything I needed in my one-stop-shop. There's a fun note pad, perfectly scented summer-time candle, plastic stemless wine glass, pineapple-infused face mask, summer fruit flavored Eos chapstick and an adorable nautical basket (for $3!).

What childcare experience has saved your sanity? And what's your favorite teacher gift? I'll be needing many, many more in all the coming years!! :)

post signature

3.24.2015

DIY Bunny Shaped Crayons


So there was a phase that Kailey went through during which she preferred not to color, but rather to tear all the paper off the crayons and break them into pieces. It kept her extremely occupied—sometimes as long as 20 minutes—so I endured because it provided the opportunity to throw dinner together or finish cleaning something. Over time, though, the broken colors all just got shuffled into the mini buckets of crayons I keep handy for the kids to use. I got fed up with it eventually, though, and sorted through everything and tossed all the broken pieces into a ziploc and shoved them into my craft closet.


Thanks to Pinterest, I hung on to the broken crayons so I could try making new ones with them. I found  this Wilton bunny silicone mold, stripped the paper from any pieces that Kailey hadn't already torn off, broke or smashed larger crayon pieces and filled up all the bunny molds. 


I put it on top of a lined baking tray just in case something spilled or melted over, because I had no idea how this would actually go. Turns out, I could have really packed the molds full because the crayons melted waaay down and turned out thinner then I wanted. Next time!

They took 30 minutes on 180F degrees, then I carefully put the silicone tray in the fridge to speed up the cooling but you can just let them cool down on the counter, too. I popped them out and tested them on some paper and they worked great! I'll be putting a handful of bunny crayons into clear cello bags with an Easter gift tag to put in my kiddo's Easter baskets as well as some for cousins and friends.


Check out these free Easter gift tag printables as well as more Easter crafts and decorating ideas on my Easter board on Pinterest!

Update: I put together a page of printable gift tags of my own using some free clipart from the web, you can download them for free right here!
post signature

3.13.2015

DIY Simple Wood Crate Side Table

We've reached another big milestone in our house! No more baby gates! In a hurried frenzy of productivity this past Wednesday while the kids were at my parents house, I began organizing toys, cleaning out storage space, labeling bins and took down the gates that barricaded the play room. We will slowly begin transitioning it to a more official living room and play room combination—I'm already loving it and the kids were beyond thrilled at their official household freedom.

Many of the toys that were in the play room stayed, and I just moved things around to create a reading corner, a kitchen corner, a space for Harrison to play with his cars and used the train table as a sort of coffee table in front of the love seat and recliner (I dragged the latter down from upstairs all on my own!). I also plan to leave less toys out and use bins and bags to organize and store them so the kids only have out a few things at a time. My quad mom friend, Amber, does this with great success, which helps minimize the mess and clutter in her house. But more on that and the new play room later! For now, I needed a quick and easy side table to throw into the mix as I was feeling brave and wanted a place to put a lamp, drinks and stash books and magazines so adults could both relax in there and also easily read to kiddos that climb up in our laps.


no more baby gates!
I was out running errands that morning and spotted wooden crates at Michaels when inspiration struck. With my 40% off coupon, the crate was only about $8 and change. (Even Wal-Mart isn't that cheap, I think their's are $10.) My errands happened to take me by a second Michaels so I stopped by there to grab wood glue and a second crate with the coupon, since you can only use the coupon on one item per visit, and headed home. 


The small paint pots are from Target, which is their own paint brand, and the sponge brushes are cheapies from Wal-Mart. I threw them away when I was done because the wood tore them up a bit. And after all my work I realized that I probably could've saved myself some time and effort by just spray painting the crates but oh well! 


I painted the turquoise on the inside first then followed up with the darker blue. Then I went back with a smaller brush to correct any mistakes where the dark color got on top of the turquoise. There's still a few spots I'll need to touch up, especially on the sides that I glued together that are missing paint. I didn't bother for it to be perfect as I wanted a slightly rustic look. Some of the boards inside the crates aren't fully saturated with paint since I wanted it that way. I also just let it all dry before putting it to use, but might spray it with a sealant later on. And for now, I like the brighter colors for the play room but can always repaint later!


A liberal amount of wood glue, a set of clamps and some Coke boxes for weight and the whole thing was done! It was dry by the time I finished rearranging the play room so I brought it in and added a spare lamp from the guest room, some food magazines and tot-friendly books.


It's provided the perfect place for me to set my tea and a magazine when I need to rest for a few minutes  in between potty training, which we are doing full force this weekend!! More on that later! For now, I hear a toilet seat slamming and must investigate...

...time for more wine!
post signature

10.02.2014

{Littles Learning} Orange & Yellow Weeks

Several weeks ago, I worked our way through the colors of the rainbow (ROYGBPV), focusing on a different color each week through various activities, crafts and books with the quads. You can read about Red Week here. I hadn't completely gotten my plans together so Orange Week barely happened, but Yellow Week was a big improvement, so I thought I'd include both in one post.

I had one of those cute dollar books from Target that had pop-up animals inside and had already spied a simple construction paper tiger craft on Pinterest, so paired those together for our orange activity of the week. We read the book and talked about the tiger's orange color and black stripes, then I gave each kiddo pre-cut pieces of construction paper and helped them glue-stick the pieces onto their paper. I assisted with the ears, legs and googly eyes but let them do the square body and black stripes completely on their own, so we ended up with lots of funky-striped tigers. I drew on the faces with a permanent marker and hung them up in the play room so the kids could admire their work and we could reference the color throughout the week!


The only other activity we managed during orange week was an orange-themed matching game I downloaded in this orange color pack for free. Thanks Pinterest for another handy find!


Moving onto yellow, we visited the same website for our yellow color pack and used the yellow coloring book and yellow-themed flashcards.


While they colored with various shades of yellow crayons, we talked about items that are yellow and the kids each got a lemon to hold, feel and roll around on the table.


We reviewed their yellow books later in the week (after they color the pages, you cut them apart and staple together to form a book). Super easy and they liked flipping through them!


On a sunny morning after breakfast one day, I put the kiddos water table in the front yard with yellow bath coloring and gave them yellow plastic cups and they went to town. I had to remember to discuss the color frequently as we used objects in that hue and point out items that were of the same shade throughout the week.


Check back in for the rest of our color series posts coming soon!

post signature

8.10.2014

{Littles Learning} Ocean Week

I've officially added a new category to my regular posts called "Littles Learning." I'll be filing everything that has to do with educational activities, crafts and outings for the quad squad under that so hopefully it's easier to find and refer back to as we share our experiences on the blog!

A couple posts ago, I mentioned the book-and-craft combos I kickstarted each week, inspired by my fellow quad mom, Amber, who also shared her own literacy-based craft ideas on her blog, 
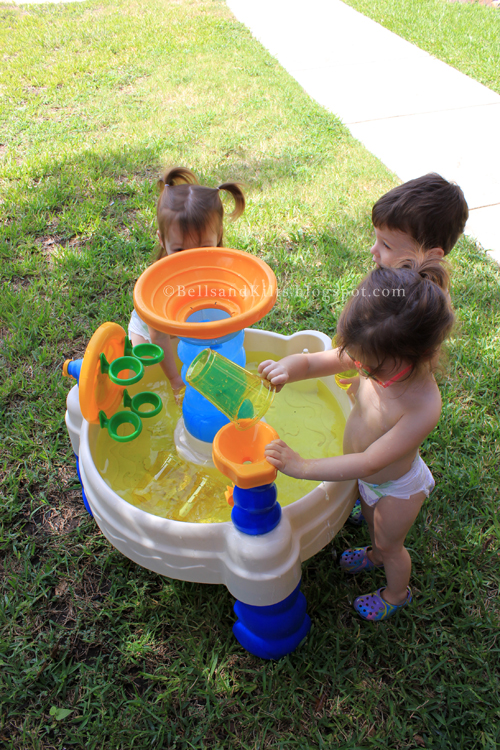
Four to Adore. Things have sort of taken off for us from there and last week we did an ocean theme with various associated crafts, books and activities.

Before you start thinking I'm all organized and on top of things, please know that just because I'm showing you photos of all these things we did in a week that the rest of the time my house is clean, my kids are well-behaved and I live behind a white picket fence. Some of these activities lasted five minutes while others lasted an hour, some were met with smiles and unfettered interest and others were met with cries and protests and throwing of things. So, you know, to each his own and stuff like that. ;)


I am no chalk artist but I did try to get a little creative with our chalkboard fireplace cover! I figured I might as well find as many ways as possible to incorporate the theme or lesson or book I'm focusing on each week in as many ways as possible. So I drew a couple sea animals on the board and was one proud momma when my little red-head, Trystan, could easily identify each one by the end of the week!


We read our beloved Pout Pout Fish books several times that week...


And I also went out on a limb and tried an activity I'm not normally drawn to, which is to make any kind of "goop" for my kids to get all over them, much less one that required I use my kitchen accessories to do it! But the sea foam activity proved a success and the kids loved it. I put 1/3 cup water, 1/3 cup dish soap, 1 tablespoon corn starch into my mixer and put it on high for several minutes until it got nice and foamy. I used washable finger paint to add a little color without running the risk of staining everything within reach of 40 little fingers. Then I realized that my leisurely pace wasn't going to cut it as foam began morphing into soppy colored water in the bottom of my plastic bin, so I churned out enough bowl fulls of whipped soap as fast as I could and hauled the bin to my front porch for the kids to explore.


I hid some sea shells, plastic sea animals and plastic spoons in the bottom of the bin for them to find, and also switched bins halfway through my foam making-process because a shallow, longer container worked better for toddler access.


Another afternoon, while Granddad read Pout Pout Fish, I gave each of the kids an empty water bottle, some small sea shells and little colored gemstones (which were a buck for a sack from Wal-Mart) to start their ocean bottle craft. They spent a good ten minutes emptying the shells out of their bottles then putting them all back in.


After both books had been read, I turned on a slideshow of underwater animals that I'd quickly compiled on my laptop and played this ocean wave soundtrack while I went down the line and helped them each scoop a few tablespoons of sand each into their bottles. (Yes, we got sand elsewhere besides the bottles and yes, I tried not to sweat all the sand that Bam Bam managed to sling everywhere in 2.5 seconds!) Then I added a little glitter, two drops of blue food coloring and some water to finish it off. I used a hot glue gun and squeezed some glue to the inside of the cap before screwing it back on so that the quads couldn't open their bottles and tie dye the carpet in their play room! When I handed each one back their bottle, I also gave them a small sheet of fish stickers to add to the outside since I couldn't find any small toy fish to go inside the bottles. They actually really enjoyed decorating with the stickers, even if they started peeling them off their bottles a few days later. Whatever gets the longest attention span and keeps these toddlers happy!


After the craft was completed and while I vaccumed up some of the wayward sand, the kiddos each got a Bubble Guppies cup of goldfish—I know, so theme-perfect right?!—and settled in on the couch in the play room to watch The Reef, a cute little animated underwater adventure.


We also watched a couple Bubble Guppies episodes throughout the week that dealt with sea animals or the like as well as our Baby Einstein Baby Neptune DVD, our Baby Genius Underwater Adventures DVD (where they learned about seals and can now identify those as well) and any other show I could find that coincided with the ocean. All this replaced our usual afternoon animated TV watching since we try to keep the TV off during the morning and save that little nugget of entertainment for post-naps. Momma needs all the help she can get!

Other activities that I'd considered but did not get to included these adorable handprint crabs, seashell matching, a construction paper underwater scene and a fishbowl paper plate craft.

All in all, I think the quads really enjoyed the activites and I felt good knowing we'd do some new things and new experiences for both sensory and learning. Look forward to sharing our color series with y'all!

Up next: a delightful Weekend Recap...
post signature
Related Posts Plugin for WordPress, Blogger...