Showing posts with label Cleaning Tips. Show all posts

1.29.2015

New Entryway Decor & My Cleaning (Sort Of) Schedule

I love having a clean house. But reality often interferes and my house is a mess 80% of the time. Having people over is a huge motivator for the husband and I, because we'll blitz the whole place prior to guest's arrival and have everything tidied up and sparkling. With the New Year, I wanted to adopt a new mantra of house cleaning. (But also not get crazy overwhelmed when things fall out of order, either.)

Below is the cleaning schedule I was actually successfully maintaining for awhile, but then completely got off track around the holidays and am now hoping to resume again. It breaks everything down so that I don't feel like I have to do 18 things each day, yet it's enough to keep the house in good shape and dust from growing on my walls. I also have to tell you right now that meal planning each week is the best thing ever. It keeps the guess work out of cooking, I plan my meals based on what days are busier and which days I'll have more time to prep food and it enables those who might be home with the kids when I'm not (the husband) to stay on track. I've been using this simple meal planner for months now....and if you love my cleaning schedule sheet, you can download or print your own copy right here—because I believe in sharing. :)
Though I try my hardest not to let the mess cause me stress—and put play time with the kids, work and family time first—sometimes I just can't take it anymore. I'd fallen so behind in house cleaning then I'd packed up all my Christmas decorations and hadn't repaired any of the aftermath that my foyer looked like this...


Yeah.

But I got randomly motivated on Monday while the kids were at school and was able to speed clean a few things, including my floor that was covered in a lovely array of crushed graham cracker, and now I feel better. Or at least my eye has stopped twitching.


During Christmas, I got several of the cheapo white frames from Ikea for the wall that you see as soon as you come in the front door. I had Christmas tree coloring papers that the kids had decorated and then new family photos we had taken, which are still on display. Now that the holidays have come and gone, I wanted something fresh so I printed out some free wall art courtesy of Pinterest and am loving the new look! Plus, I've ordered some new black and white prints of the family and the kids to replace the current images for a less holiday-ish vibe.


Texas printable (other states available) | think deeply quote
...more free printables available here


A few simple light-hued accessories, photo frames, candles, flowers and one lamp later, I was satisfied with the refreshed look and it no longer looked like I hoarded laundry, toddler shoes and graham cracker crumbs when you enter my house. It was a close call there for a little bit, y'all.

And a cleaned up foyer and living room means it's the perfect time to have four two-year-olds leave a fresh trail of popcorn behind them as they settle onto the couch for a Disney film. Good thing they're cute. :)


Do you have some awesome printables? New decor up? Cleaning tips or schedule? Send me a pin on Pinterest, fool, or share a link to your fave stuff in the comments below.

Happy (almost) Friday!!
post signature

2.03.2014

{DIY} Cooking Spray & Veggie Wash

As time goes on and I read new magazines and scavenge Pinterest for the latest crazes, I glean more and more tips on how to eliminate chemicals from my kitchen. I've long been a fan of Seventh Generation's dishwasher tabs (we used them for all the baby bottles we used to wash!), their dish soap and their plant-based anti-bacterial cleaning spray. (For those wondering, I typically buy all their products at Target or Kroger, but a quick search revealed you can order them on Amazon, too!)


So I'd seen a few pins about making your own olive oil cooking spray versus using something like Pam, that contains a lot of added chemicals. I vowed to try it for myself as soon as I'd finished using up what I had and that day came this morning. I grabbed a clean, empty spray bottle and filled it with one part olive oil to five parts water. So, for instance, my spray bottle held 1/2 cup olive oil and 2 1/2 cups water.


The oil and water definitely stay separated in the bottle, so you just have to shake it up real good before you spray anything. I tested it out on some cinnamon rolls I baked for the babies' breakfast this morning and it worked great! They didn't stick to the foil at all and weren't crusty or burnt. I look forward to using this healthy alternative for all my stove-top cooking as well!


For the past several months, I've been making my own fruit and veggie wash as well. It's really complicated, though. Are you ready for this? Fill a spray bottle with half white vinegar and half water. Like I said... complicated. ;) I thoroughly spray down all the fruits and vegetables we eat, including potatoes, and then rinse them in cold tap water. There's no taste of vinegar left behind and I've read that it kills 99% of bacteria on the food. You can use it on salad greens, berries, anything.


I even pour a half cup or so of vinegar into my washing machine sometimes when I've got some bibs or baby clothes that are smelling a little rank and they come out super fresh. It's also great for getting the musty smell out of towels and bed linens. And, again, there's no vinegar odor left behind as you long as it's rinsed!

What's your favorite chemical-free kitchen product?
post signature

9.23.2013

{DIY} How to Clean Glass Candle Jars

Typically, I'm not one to save every little thing and try to reuse it. Honestly, sometimes it takes up more space and energy trying to figure out ways to recycle some stuff then to just toss it in the trash. Or recycling bin. ;)

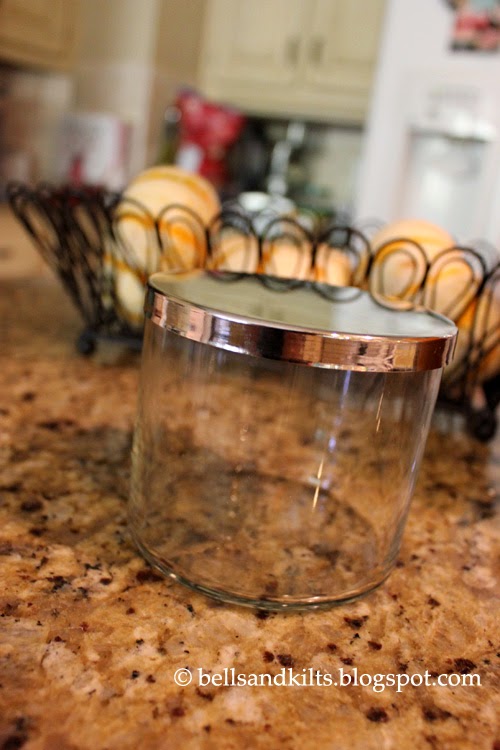
But I always wished I could clean those nice big glass jars that the Bath & Body Works candles come in and reuse them. Then I found a couple cleaning ideas on Pinterest and put one to the test. It worked like a charm so I share it with you now.


Put the candle in the freezer for about an hour. Or just toss it in there and forget about it for a couple days until you can get back to it, like I did. Take a dull knife and poke at the wax a couple times to break it up then pry it out.


I saved my wax pieces in a ziploc and just wrote the scent on the bag then stuck it back in the freezer. Now I'll have my own wax melts when next summer rolls around, likewise for my fall and winter scented candles when I'm done with those, too. Perfect for any size wax warmer and a good lil money saver!


Peel off the labels. If the bottom label doesn't comply, stick the jar in a little bit of warm soapy water for a few minutes and it'll then peel right off.


Squirt some baby oil in the jar and use a paper towel to wipe off most of the soot and wax. I did this twice, I think, it be sure it was all clean.


Do a quick rinse with soap and water then dry. It's ready to use now! I used mine for Q-tips and cotton balls in our bathroom, but I also thought they'd make great gift jars filled with candy and wrapped with a bow or stacked full of small cookies. What would you do with these jars?


For fun, here's some of my favorite gift-in-a-jar ideas.
post signature
Related Posts Plugin for WordPress, Blogger...